


When it comes to the demolition and removal of an old fiberglass shower and installation of a new tile shower, one thing that sets us apart from other contractors is the way we keep our mess contained to the work area. The rest of the home remains virtually dust free.
For this dustless shower replacement, our setup included:
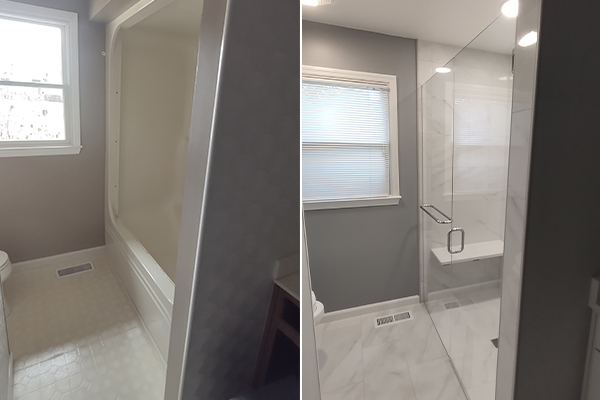
We removed the fiberglass shower and the rest of the old bathroom features, as well as the soffit, that is, the portion of the shower ceiling built a little lower than the rest of the bathroom ceiling. The homeowners wanted a wider path to the toilet and shower area, so we modified a partition wall.
Shower installation begins with plumbing, substrate prep, and the installation of the walls and waterproofing. Successful tile installation relies on precise placement of everything under the tile that no one sees after the tile is installed and grouted. We spend far more time on these steps than we do installing the tile. This should be true of every contractor who properly installs a tile shower.
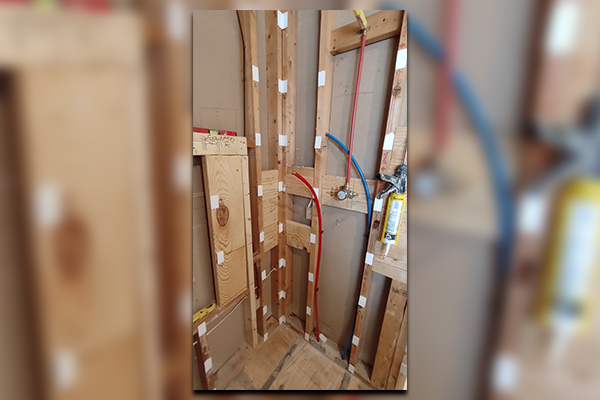
We replumbed the entire bathroom, replacing all the PVC pipes with PEX-A, a flexible type of pipe with a long history of reliability. We also installed a new shower valve and arm. Our clients were glad they did not have to hire a plumber to do this work.
With the plumbing in place, our next step was substrate preparation.
To create a structurally sound and stable foundation, we used 2×8 nailing blocks. Then we affixed new BCX plywood to the nailing blocks. BCX is a type of plywood with moisture resistant adhesives.
Next, we replaced the fiberglass insulation with water-resistant, vapor-permeable, fire-resistant rock wool. We utilized the Built With Foam wall flattening shim system to ensure the wall boards would be flat, plumb, and square and provide the best possible structural support for the tile and grout. We also used shims to level the new drywall ceiling in the shower.
For the shower walls, we used HYDRO BAN® Board detailed with HBB adhesive sealant for any areas where the boards met (joints), as well as anywhere the boards had been affixed with screws. Our waterproofing process is meticulous, with redundancies for extra protection.
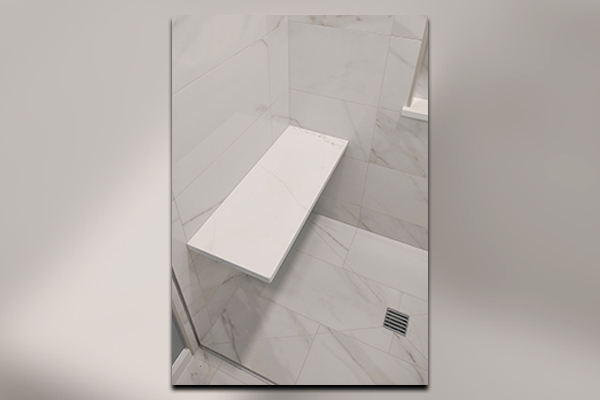
We also installed the hardware for the floating quartz bench, which matched the new vanity top, using The Original Granite brand brackets.
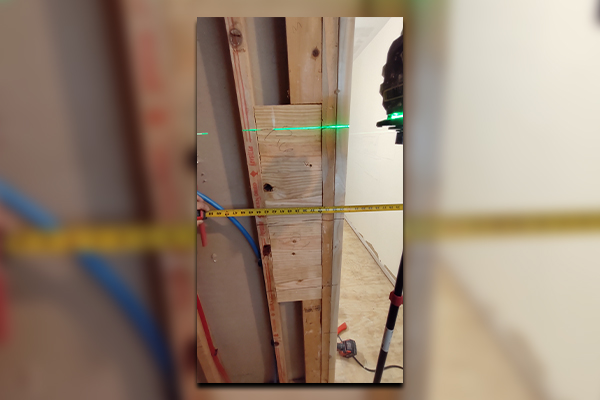
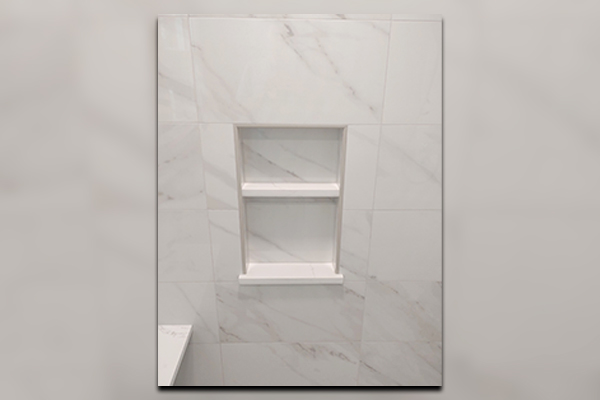
Our clients wanted a niche to eliminate the need for bulky shower caddies or shelves. They were looking forward to having a sleek, modern storage space to organize their shampoo, soap, and other shower necessities. To prepare for the niche installation, we cut out studs and installed a header to help preserve the structural integrity of the wall. To further reinforce the wall, we used structural screws to secure top and bottom plates to all the studs.
Although our clients did not want grab bars in the shower, we reinforced the shower walls (blocking with 2×4 boards) to support the potential future installation of grab bars.
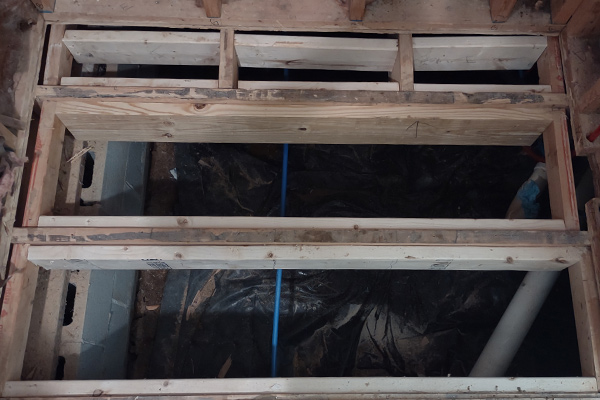
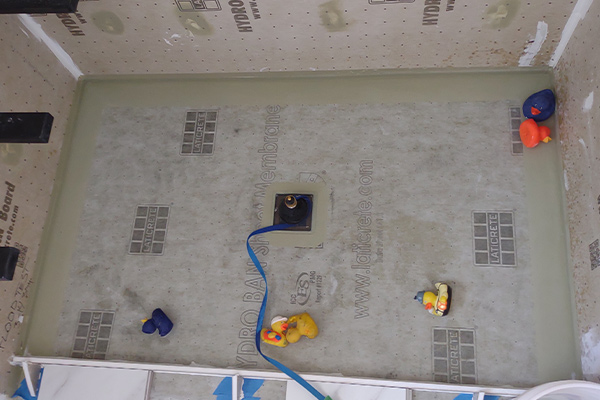
Water must be contained and directed toward the drain in a curbless shower, but we do not cut the joist to slope the floor downward, which is against local building code. So, we needed to raise the floor. But no one wants a curbless shower with a curb at the bathroom door!
To resolve this problem, we implemented a complex, multistep floor prep process to create a floor ramp. We placed an elaborate system of dams to prevent overflow, primed the entire floor, and poured flowable hydraulic cement underlayment (FHCU). We spread and leveled the mixture to specifications, smoothing out high spots and filling in low areas. As we worked, we used laser levels to verify the floor would meet ADA ramp requirements. We installed STRATA_MAT™ XT, a high-performance floor underlayment, to provide the added height we needed outside the shower.
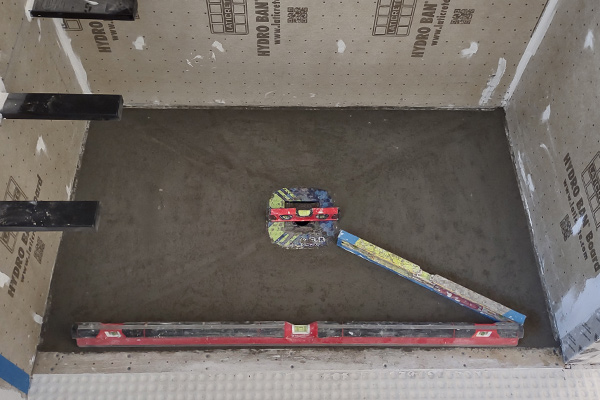
We also prepped the shower pan, installed a FloFX drain, and waterproofed using a combination of HYDRO BAN® Sheet Membrane and HYDRO BAN® topical membrane.
Before installing tile in the shower, we performed a 24-hour flood test. This step is crucial to detect any leaks or weaknesses in the waterproofing system. Water damage can be costly and inconvenient for both us (since we stand behind our work) and our clients. Even though our waterproofing consistently passes flood test after flood test, we always perform them, for our clients’ peace of mind, as well as ours.
Our clients selected beautiful Spanish porcelain tile with a matte finish from ProSource. We designed the layout for the entire bathroom to center with the shower floor.
To prevent uneven tile edges we utilized a tile lippage system during installation.
We installed the custom niche shelf to the height specified by the client.
To provide a nice, clean finish to exposed tile edges, we installed Jolly profiles by Schluter. We also installed Schluter®-DECO-SG profiles with support channels for glass panels on the floor and wall so that the glass installer (North Alabama Glass) could easily complete the glass installation without compromising our waterproofing or warranty.
The final steps of tile installation were to seal the tiles, grout with SPECTRALOCK® PRO Premium Grout in Frosty color/finish, and apply LATASIL™ color-coordinated silicone.
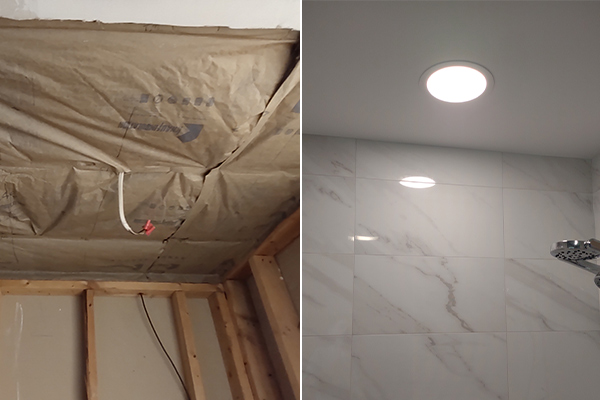
We also installed a new recessed 8″ LED light with a dimmer switch to illuminate the gorgeous new shower. No more dark “cave style” shower!
We removed our dust control system and protective coverings and completely cleaned all surfaces, making the bathroom look pristine and ready for use.
The homeowners were amazed at the luxurious appearance of their small hall bathroom and were so glad to be rid of the fiberglass shower. Read their 5-star review.